

 cooling in the fridge for 4 hourss. haha

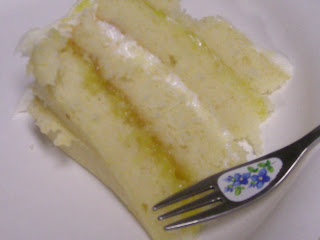
So I had it all to myself! But if I did make the truffles, then I would eat it all by myself, and that would do horrors (not wonders) to my skin. And so, I decided to let it cool. Then, I would dip butter cookies in it. And it would look pretty! And it did. Soo cute. Kinda reminded me of Milanos.

That week was also the Sunday where I bake something at Perrin's for the mentally ill. But this week was extra special because they came here to the restaurant instead of us going there (to the church). It was extra special because of Christmas! So of course I made chocolate chip cookies SUSAN STYLE! (its my own recipe!), star shaped butter cookies dipped in melted truffle liquid, vanilla cupcakes (let me explain), and Oreo clones! The reason why the chocolate chip cookies were susan style was because it was my recipe! I looked at the Nestle Toll House Cookie recipe and I made alot of changes. So it's mine! hehe. But the bad news was, it tasted like the cookies my school sells for 75 cents. It tasted all chewy and had the consistency of bread. So that was a dissapointment. But whatever! My excuse is that it tasted weird because it was a healthy cookie (it had 3/4 cup applesauce and 1/4 cup butter instead of 1 cup butter). The star shaped butter cookies, well, they were so popular that I didn't get to taste it. But everyone else said it was good. The oreo cookie clones were not what I expected. The filling was TOO sweet. And so I had to squeeze the two black cookies together to get rid of the excess filling. And I preferred the chocolate cookies to be chewy. Because it was either chewy, or crispy. And Oreoes are thick and crispy/crunchy but these were thin and crispy. And the only things I like thin and crispy is my pizza. Ok, so let me tell you about the vanilla cupcakes. I had it all figured out. I was gonna make Billy Reece's Vanilla Vanilla cupcakes, but the big controversy is whether it is 1 tablespoon or 2 tablespoons. I chose 2 even though everyone else did 1 because? Billy himself said 2. And Martha said "Oohh, that's alot of baking powder." So MHM. But, I overbeat the batter because there were small chunks of butter because I didn't soften it. -_- And I had especially bought cake flour and the #16 ice cream scoop. But it seems too much. I don't know whyy. Am I supposed to level it?
*sigh of defeat*


hehe, poking them out was the only fun part. :[
:[
Anywhoo, I needed vanilla cupcakes, and what I got was vanilla monsters! So, I was forced to use 2 French Vanilla box mixes. I then dyed it red but it turned out pink. And I added ALOT! The picture makes it look red but it wasn't. I now understand why chefs and bakers favor the food coloring gel. But I did make Billy's Vanilla Buttercream Frosting! It was sweet. Just like any other frosting. But it looked kinda weird since I added green food coloring. I now understand why chefs and bakers favor the food coloring gel.

Billy Reece's Vanilla Cupcakes
INGREDIENTS
1 3/4 cups cake flour, not self-rising
1 1/4 cups unbleached all-purpose flour
2 cups sugar
2 tablespoons baking powder
3/4 teaspoon salt
1 cup unsalted butter, cut into 1-inch cubes SEE IT DIDN'T SAY SOFTEN! (one disadvantage of getting recipes from the internet is that some same recipes have different ingredients).
4 large eggs
1 cup whole milk
1 teaspoon pure vanilla extract
DIRECTIONS
Preheat oven to 325°. Line cupcake pans with paper liners; set aside. In the bowl of an electric mixer fitted with the paddle attachment, combine flours, sugar, baking powder, and salt; mix on low speed until combined. Add butter, mixing until just coated with flour. In a large glass measuring cup, whisk together eggs, milk, and vanilla. With mixer on medium speed, add wet ingredients in 3 parts, scraping down sides of bowl before each addition; beat until ingredients are incorporated but do not overbeat. Divide batter evenly among liners, filling about two-thirds full. Bake, rotating pan halfway through, until a cake tester inserted in the center comes out clean, 17 to 20 minutes. Transfer to a wire rack to cool completely. Repeat process with remaining batter. Once cupcakes have cooled, use a small offset spatula to frost tops of each cupcake. Decorate with sprinkles, if desired. Serve at room temperature. Billy's Vanilla Buttercream INGREDIENTS 1 cup (2 sticks) unsalted butter, room temperature 6-8 cups confectioners' sugar i used 5 cups 1/2 cup milk 1 teaspoon pure vanilla extract DIRECTIONS In the bowl of an electric mixer fitted with the paddle attachment, cream butter until smooth and creamy, 2 to 3 minutes. With mixer on low speed, add 4 cups sugar, milk, and vanilla; mix until light and fluffy. If necessary, gradually addmore sugar to reach desired consistency.

Susan's Chocolate Chip Cookies; makes 36
INGREDIENTS
1/4 cup butter, melted
3/4 cup applesauce
2/3 cup white sugar
2/3 cup brown sugar
1 eggs
1 tablespoon vanilla extract
2 1/4 cups all-purpose flour
1/2 teaspoon baking soda
1/2 teaspoon baking powder
1 teaspoon salt
1 1/2 cups chocolate chips
DIRECTIONS
Preheat oven to 350 degrees F (175 degrees C). Grease cookie sheets. In a large bowl, cream together the melted butter, applesauce, brown sugar and white sugar until light and fluffy. Add the eggs one at a time, beating well with each addition, then stir in the vanilla .Combine the flour, baking soda and salt; gradually stir into the creamed mixture. Finally, fold in the chocolate chips. Drop by rounded spoonfuls onto the prepared cookie sheets. Bake for 8 to 10 minutes in the preheated oven, until light brown. Allow cookies to cool on baking sheet for 10 minutes before removing to a wire rack to cool completely.

Butter Cookies; makes 48 cookies i got 24 stars
INGREDIENTS
8 ounces unsalted butter
3/4 cup granulated sugar
1/4 teaspoon salt
1 1/2 teaspoons pure vanilla extract
1 egg i used 1 large egg yolk
2 cups all-purpose flour
DIRECTIONS
Beat the butter, sugar, salt and vanilla together until smooth and creamy. Mix in the egg yolk until well incorporated, scraping down the sides of the bowl at least once. Add the flour and mix just until incorporated. Scrape onto a lightly floured board and knead a few times, just until the dough smooths out. Turn onto a sheet of plastic wrap and roll into a log, wrap up and refrigerate for several hours or freeze. Before baking, preheat the oven to 325°F. Line your baking sheets with parchment. Slice the dough into slices about 1/8" thick and place them on the sheets about an inch apart (they won't be spreading very much, but they need air room around each cookie). Bake until JUST beginning to turn golden around the edges, about 16-18 minutes. Note: you can do many things with these cookies. You could roll the dough out and cut shapes.You could slice them even thinner and sandwich them with chocolate or jam or lemon curd or vanilla buttercream!You could make them and then dip them half into chocolate. <-- thats what I did.
The pictures of the Oreos, its only half of the cookie dough. There wasn't enough time to make more.

Oreo Cookie; Makes 50 sandwich cookies
Cookie Recipe from How to eat a Cupcake
INGREDIENTS
2 cups all-purpose flour
2 cups Hershey's Special Dark
1 teaspoon baking soda10
1/2 ounces semisweet chocolate, coarsely chopped
14 tablespoons (1 3/4 sticks) unsalted butter
3/4 cup sugar
1 large egg
1/2 cup light corn syrup
DIRECTIONS
In a large bowl, sift together the flour, cocoa, and baking soda. In a small heavy saucepan, melt the chocolate over low heat, stirring the entire time. Remove from the heat and cool slightly. (You may also melt the chocolate using a microwave-safe bowl, setting the microwave at half power for 1 minute; remove the chocolate, stir, and return to the microwave for another burst, if needed. When the chocolate is half melted, stirring will complete the process.) In a medium saucepan, over medium heat, melt the butter with the sugar, stirring to dissolve the sugar. Remove from the heat and add the melted chocolate, egg, and corn syrup; mix thoroughly. Pour the chocolate mixture into the dry ingredients and mix well to blend all of the ingredients. Drop by SMALL teaspoonfuls onto cookie sheet lined with parchment. After you've made uniform balls, press the cookies down flat (this time I was able to use the heel of my hand to push them down, but if the dough is too sticky, I've used the underside of a glass coated continually in powdered sugar) so they will be more like a thin oreo cookie.It's best to make these small so the chocolate cookie doesn't overwhelm the filling. Bake at 350 for 11 minutes. CHECK as you go! (This temp/time combo makes a really crisp thin cookie, much like the actual oreo, but play around if you want it softer, or chewier, I know I do.) Ok, so. First, I rolled it out then cut it out with a jam top. Then I pressed down with my palm because the powder sugared cup didn't work. But that took way too long. And so in the end, I rolled the dough into a log and cut.

 Beautiful, but it took me more than an hour. So. Not. Worth. It.
Filling from Baking for John
Oreo Filling
INGREDIENTS
1 cup plus
2 T unsalted butter, room temp
2 cup powdered sugar, sifted (really, you should do it)
1 T vanilla
1/2 cup white chocolate chips, melted
Melt chips 1 min on high in microwave, mix until totally melted and smooth. Let sit. Beat butter until smooth. Add sifted powdered sugar. Once the butter and sugar and light and fluffy, add vanilla and melted chocolate. Mix well. Using a plastic bag with a half inch opening, pipe a generous teaspoonful of filling on one side, then top with a similar sized cookie and push together to even out the filling. This is a big amount of frosting, because they really taste great with a lot of filling. You can halve it if you'd like less. The cookies aren't very sweet, so putting them with a lot of filling makes for a great sweetness. <--- I did that and it was too sweet.

NOW, on to the fun part! Woohoo!
I was the first to comment Adam's "Um, I think I Overslept" post.
When I went back to see if he had a new post, I reread the old one and saw that I'd been tagged. Foolish me. And then he said take any award off his trophy wall and so I (Yum ninja) chose the Yum-yum blog award. My first award! I am overjoyed. Thanks for making me smile Adam :))))
Tag- Meme :)
1. Where is your cell phone? idk,, thats one word right?? :)
2. Where is your significant other? single
3. Your hair color? dyed
4. Your mother? strict
5. Your father? caring
6. Your favorite thing? ring
7. Your dream last night? nightmare.
8. Your dream/goal? NDA
9. The room you’re in? computerroom !
Theres no #10...haha okay. let me make one..
10. Your current emotion? content
11. Your fear? failure
12. Where do you want to be in 6 years? college
13. Where were you last night? home
14. What you’re not? stupid
15. One of your wish-list items? guitar
16. Where you grew up? la
17. The last thing you did? think
18. What are you wearing? pajamas
19. Your TV? off
20. Your pet? potato
21. Your computer? black
22. Your mood? content
23. Missing someone? mhm :[
24. Your car? nonexistent
25. Something you’re not wearing? gloves
26. Favorite store? williamsonoma
27. Your summer? fun
28. Love someone? mhm
29. Your favorite color? green
30. When is the last time you laughed? today
31. Last time you cried? thanksgiving
Well thats it, hope you had fun reading! :)


 Everything added


 Ingredients:
